Candy Bar Cake

I have never met a person that did not like this cake. The candy bar cake is perfect for just about every occasion there is. My little brothers love it!

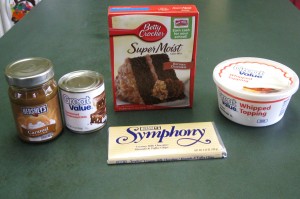
Ingredients:

  • German chocolate cake mix
  • Can of sweetened condensed milk
  • Jar of caramel
  • Small container of whipped topping
  • Symphony Toffee Candy bar

Directions:

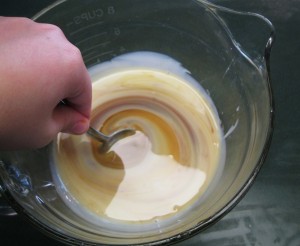
Follow the Directions on the back of the cake mix box. Bake cake in a 9×13 inch cake pan. While the cake is baking, go ahead and combine the caramel and sweetened condensed milk in a medium bowl. And also chop up your candy bar.

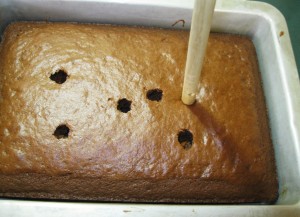
 When cake is done, poke holes in to it with the back of a wooden spoon. Let cool.

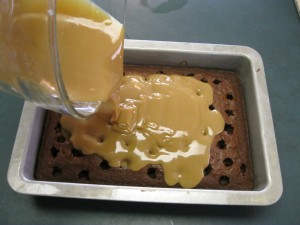
After the cake is cooled pour the carmel-milk mixture on top of cake.

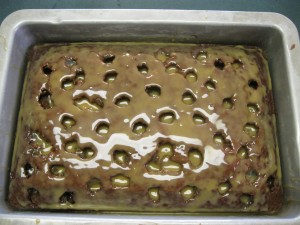
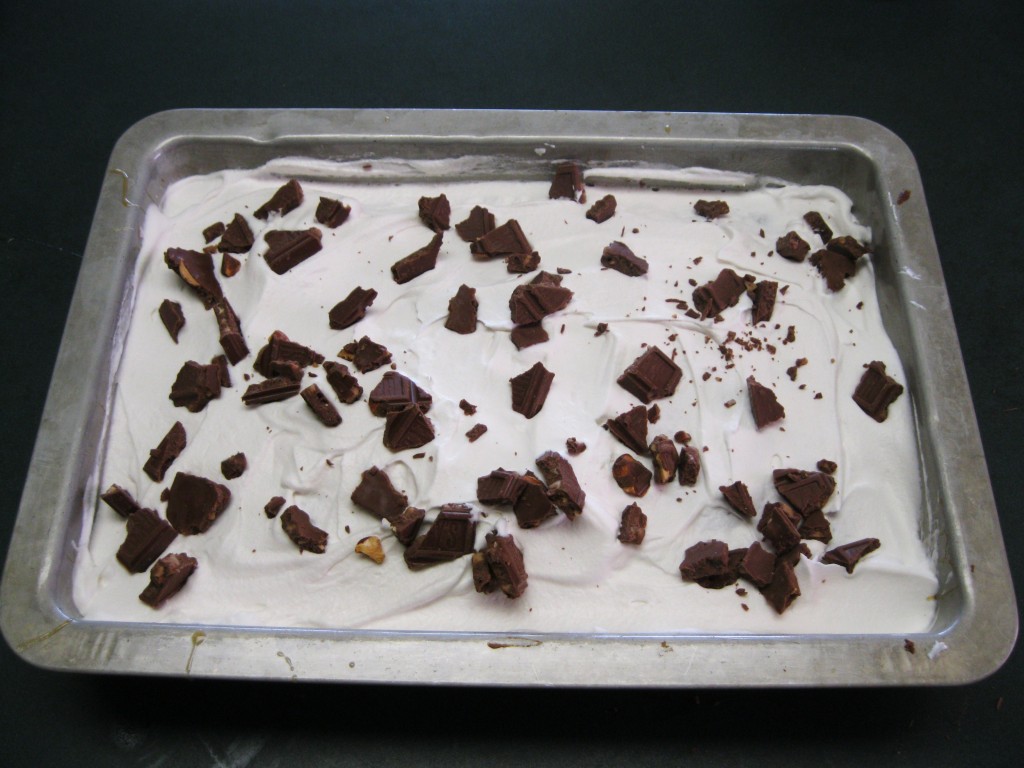
The next and final step is to spread the whipped topping on the cake and add your chopped up candy bar.

The finished product!

Posted in Recipes | Tagged , , , , , , , , | Comments Off on Candy Bar Cake

How to Harvest Worm Compost and Worms

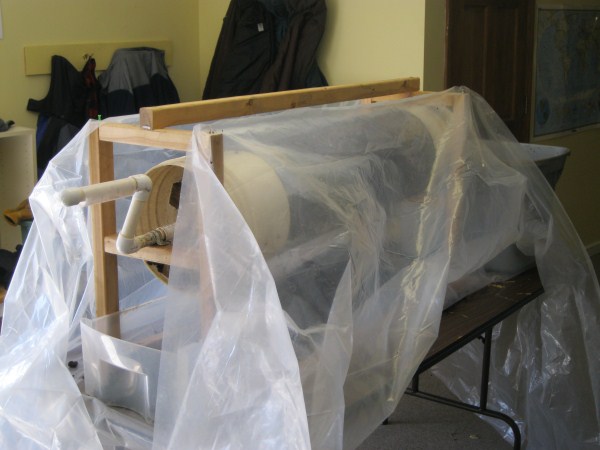
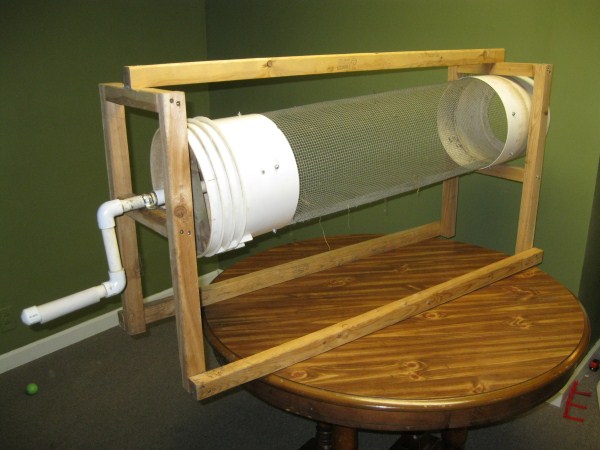
Large compost sifter

Your worms have been working away and your bin is now full of rich compost. It’s time to harvest the compost and separate out the worms. What’s the best way to do that?

There are several ways I’ve tried which include the

  • table and light method,
  • stacked bin method, and
  • compost sifter method.

I have a video below of my favorite method, the compost sifter method. But let me first describe the other two methods so you will have an idea of how to use them if you’re not ready to make a sifter.

Table and Light Method:

The table and light method is the fairly simple. It entails a table and a light source, either sunlight or an overhead artificial light. Follow these steps using the table and light method

  • Set up a table under the light source (daylight is best).
  • Take compost, worms and all, out of the bin and place them in several, separate medium piles around the table top.
  • The worms will work their way down into the pile away from the light.
  • Scoop off the top layers of the piles, worm free compost, and place into your compost bucket.
  • Repeat this process until you have small piles with mostly worms left.
  • Combine these smaller piles together and then repeat the process again until you have harvested all the compost and separated the worms.

The good thing about this method is that you don’t need to make anything special to harvest the worms. The bad thing about this it is that it takes a lot of time to wait for the worms to move down the piles and then rearrange the smaller piles, especially if you have a lot of compost to harvest.

I used this method when I first started and quickly began looking for a better way.

Stacked Bin Method:

The second method I tried was the stacked bin method. In this method, I made bigger holes in the bottom of the bins and then stacked one bin on the top of the compost surface of another finished bin. The idea is that you stop feeding the worms in the finished bin and then provide food in the new stacked bin. The worms would then work their way into the new bin to find the food.

I believe some folks have had success with this type of method, possibly using different types of bins. There are worm bins on the market that do just this process. I found this method didn’t work very well for me.

Compost Sifter Method:

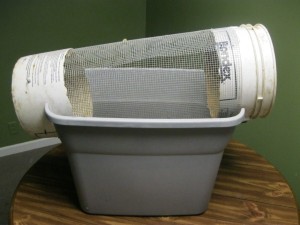
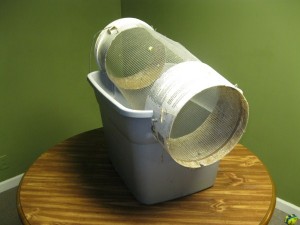
Next, I tried a smaller version of what I use now. It was a 5 gallon bucket, cut in half, and connected by two-foot-wide hardware cloth. You place the compost in this unit and manually turn the sifter in a bin that has the sides cut out at an angle. As you turn the sifter, the compost goes into the bin and the worms come out the end.


Small compost sifter - side

Small compost sifter - front

This worked good for very small amounts but was too cumbersome for larger quantities.

That’s when I found the next design that I have used for several years. I found it from a man off YouTube, but cannot find him now to acknowledge his work. It was simple to make, very easy to use and will sift large quantities of compost in a short time.

This short video shows how it works.

What methods have worked for you?

Posted in Composting, Worm Composting | Tagged , , , , , , , | Comments Off on How to Harvest Worm Compost and Worms

Adding Worms to Your Worm Bin

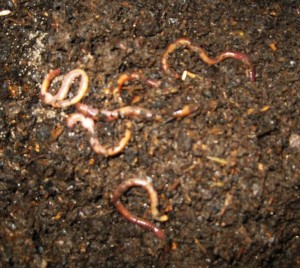
Worms in bedding

Now that you have the bedding prepared and in the worm bin, it’s time to add worms! Red Worm—Red Wiggler—Esenia Fetida—these are just a few of the names for the little guy that is your composting friend. He/she, as it is both male and female in one unit, is the powerhouse “muncher” you will use to get rich compost. They also make great fishing bait as a side benefit.
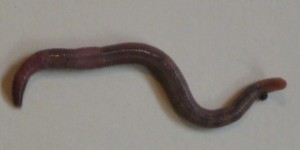
Red Worm

The worms work silently and tirelessly within the bedding as long as you feed and water them and keep them in a good environment. They also multiply quite rapidly. Add just a large handful of worms to your small worm bin and within a few months you will have a whole herd of them munching away at your table scraps.

In ideal conditions, they can reproduce near a rate of 10 young per week. Just imagine how many you could have in as little as three or four months.

Where to get worms: 

There are many good sources on the web to buy red worms. You’ll want to make sure you get them from a source that has been in business for some time. These will likely have the best care and shipping processes.

My best recommendation is to see if you have any friends that raise them and just ask for a free handful. That’s all you really need to get started. I like sharing worms with my friends. It’s fun to hear them come back in a few months and share how many have grown from just that handful. I’m sure your friend would also be happy to give you some if it is just a small amount.

What to do when you first get worms:

When you first get your worms, put them in the bedding without any food. Wait a couple days before adding food. Also, and very important, keep the lid off the worm bin and have an overhead light on the worms for about 24 hours. The worms don’t like the light and this will keep them in the bedding until they get used to it. Many times they will likely try to escape a new home if you don’t do this.
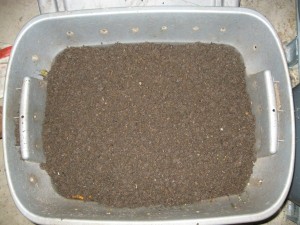
Worm bedding ready for worms

The first time I got worms, I started with two bins and about 1000 worms in a dark room in my basement. I was starting BIG. I didn’t follow this key step and when I went to check on them the next morning, I had 1000 dried worms all over the floor. They all had crawled out of the bins and dried up dead. I learned my lesson.

Once they get comfortable after 24 hours, you can put the lid on and they should stay in the bin. Leave them alone for a few days and then feed them.

What and how often to feed worms:

I feed the worms vegetable and fruit scraps from the kitchen. Raw foods are best. I have found that the worms really love banana peels and carrot shavings. This is like candy to them. Watch out though as the banana peels attract fruit flies.
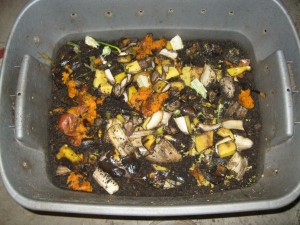
Feeding worms vegetable scraps

What not to feed? It’s not good to feed them meat or dairy related items or too much citrus produce. Also, stay away from oils such as salad dressings and greasy foods.  Cat and dog litter is not good either.

Throw in an occasional dried bread heel. Just put the dried heal on the surface of the bedding and come back in a day or two. You’ll find a whole bunch of worms eating away on the underside.

I feed the worms about once a week by spreading scraps all around on the surface of the bedding. Feed the worms less when you first start to allow the smaller numbers time to eat the food. You don’t want to put too much food in at the beginning.

After you’ve added the food, put about a 1 inch layer of additional bedding on top to give the worms some working room and also to keep the flies down. At times, fruit flies can be a problem, especially with banana peels as I mentioned before.
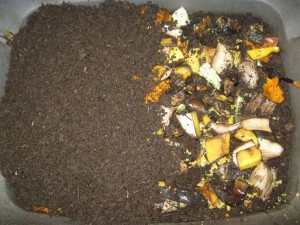
Worm food half covered; should be fully covered when done

What else to do:

Also about once a week, check the moister content in the bedding. Add water if needed to keep the bedding moist. Keep the lid on the bin when not working with the worms. That’s about it. Pretty easy.

How and where to store your worms:

Store the worms indoors or outdoors in the shade. They prefer temperatures that range from 50 to 80 degrees. They can go below 50 degrees but will really slow down. In the winter time, either bring them indoors or keep them in an area that will not freeze. Don’t let them freeze or they will die. If they get too hot, they will die as well. But they are fairly resilient creatures.

As you add food and bedding weekly, you’ll eventually get near the top of the bin. When it gets almost full, you are ready to harvest the poop. I’ll talk next time about easy ways to harvest the compost and separate out the worms to start over again.

Happy worm farming!

What tips do you have for raising worms?
Posted in Composting, Worm Composting | Tagged , , , , , , , , | Comments Off on Adding Worms to Your Worm Bin

How to Make Bedding for Your Worm Bin

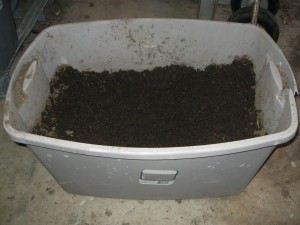
Worm bin with bedding added

As I discussed in the last post, raising worms to produce compost is

  • fun,
  • easy and
  • a great source of high-powered, all-natural, fertilizer for your garden and seedlings.

Now that you have your worm bin made, it’s time to put in the bedding and worms. In this post I’ll talk about the bedding. I’ll discuss the worms in the next post.

For bedding, there are many options you can use. A few options I’ve tried include…

  • 1 inch shreds of newspaper (better to not use the colored ink paper)
  • chopped up leaves
  • sifted leaf mold, and
  • sifted peat moss.

My personal favorite is sifted leaf mold. It’s free, easy for me to gather off the forest floor and adds additional nutrient variety to the final product. It is also easy to handle—if you don’t mind getting your hands dirty—and it adds a fairly fine texture to the compost. The worms love it too. You may need to check the PH level if you use really acid leaf mold. Worms like pH levels between 6.0 to 7.0.

The shredded newspaper is also free if you use your left over paper. But I hate having to shred the paper and weed out the colored ink that is almost on every page of newspaper nowadays. I don’t like having the colored ink in the compost because I don’t know exactly what chemicals they use in the ink, even though they may say it is natural ink. Also, since the bedding will need to be moist, I don’t like having to mess with the wet newspaper which is harder to keep from clumping.

Chopped leaves are okay but I’d rather not have to chop them and mess with the bigger pieces.

Sifted peat moss is also great bedding. It is the bedding of choice for those that want really fine compost or want to sift the compost for premium worm castings. The problem I have with peat moss is that it can be very expensive—definitely more expensive than free leaf material or newspaper. I’m all for using free things as much as possible. You’ll also need to check pH when using peat moss since it can be acidic as well. The peat moss to use is the Sphagnum variety.

When using leaf mold or peat moss, you need to sift it to remove the larger pieces to obtain a fine textured bedding. I like to use my homemade compost sifter to sift the bedding. I found this design from a man on YouTube and it works really well. I cannot remember his name. Maybe one day I’ll find him again and be able to acknowledge his work.

Compost sifter

In any case, I use ¼ inch hardware cloth as my screen which provides a really good bedding size. It also makes a good all-purpose sifter for compost. When I discuss sifting compost in a later post, you may want to use a 1/8 inch mesh for more fine compost or premium castings. But that is for another time.

With your bedding sifted, you will now need to soak it in water to get it really moist. The worms need moist bedding to thrive and reproduce and be most productive. I follow these steps to get the bedding moist:

  • fill up a large rubber container with the bedding, about 2/3 full (this will last for a quite a while depending on how many bins you have), then
  • fill it with water and mix it together
  • add additional water if needed to ensure it is completely soaked, and finally
  • let it sit for about a day to ensure it is thoroughly moist.

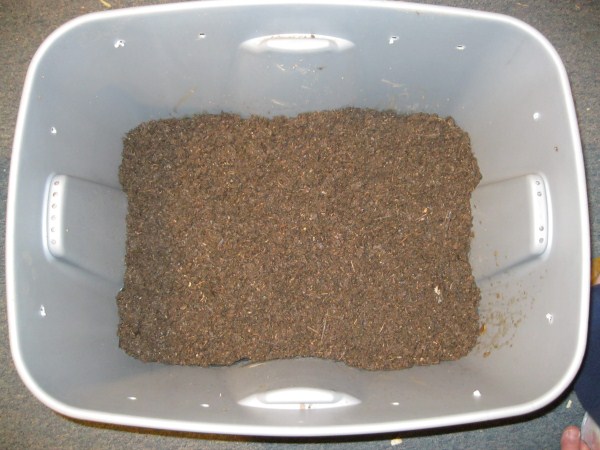
Prepared ready to use bedding

Note that peat moss takes a lot of soaking and mixing to get it thoroughly moistened. That’s another reason I prefer leaf mold. It takes less effort to get it really moist. I’m all for less effort.

Caution: You don’t want your bedding dripping wet. Otherwise, the worms may not get enough air to breath and they will try to escape your bin. You want the bedding moistened to the level of a damp sponge or a little more. If you get too much water in your bedding, you can let it dry out for a couple of days or wring out the water for immediate use.

Your bedding is now ready to put in your bin. Add about 3 to 4 inches in the bottom of the bin and then add your worms. I’ll talk more about the worms next time.

What beddings have you tried that work well for you?

Posted in Composting, Worm Composting | Tagged , , , , , , , , , , | Comments Off on How to Make Bedding for Your Worm Bin

How to Make a Simple Worm Bin

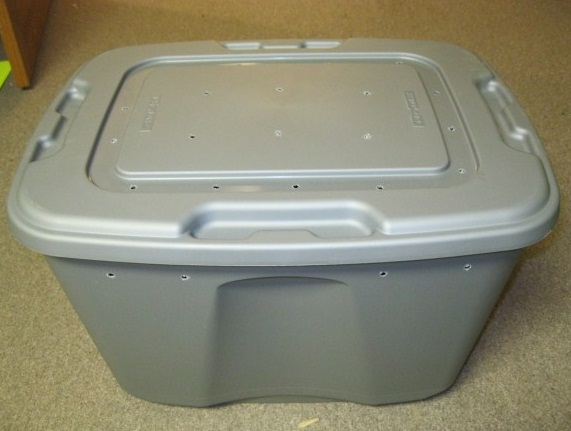
Simple worm bin

Worms are God’s soil-building machines—a virtual humus creating factory as Thomas Barrett would say. They can rapidly convert organic matter and vegetable scraps into high-nutrient compost and castings (worm poop) for your garden and other uses. There is much research to support the benefits of worm compost, also known as vermicompost.

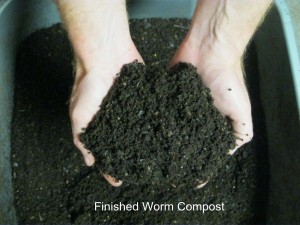
Finished worm compost

Worms are also fun to grow. Our kids, especially Theodore, love to feed the worms and search for them in the bedding. I know it may sound strange, but I love worms and it really is fun to raise them.

Raising worms is also a great way to incorporate science into your everyday activities. We like to put some castings under the microscope and see what it looks like up close and personal. Moreover, the kids get a kick out of seeing the worms go to town on the left over food scraps in the worm bin.

I use worm compost mainly as an ingredient for my homemade seedling starting mix. It makes an excellent addition to the mix. I also use it when transplanting seedlings in the garden to help prevent transplant shock.

I’ll speak more about worm composting in later. For now, I want to share a short video on how I make this simple home-size worm bin that can get you started raising worms and making compost. I’ve made several of these bins and have them around my basement full of worms doing their silent work.

I don’t mention it in the video, but your bin needs to be dark colored and should not allow light in. Worms don’t like light and do their best work in the dark. I’ll share other lessons learned in later posts.

What types of bins have you used if you have raised worms?

Posted in Composting, Worm Composting | Tagged , , , , , , , , | Comments Off on How to Make a Simple Worm Bin

Happy 12th Birthday Emma!

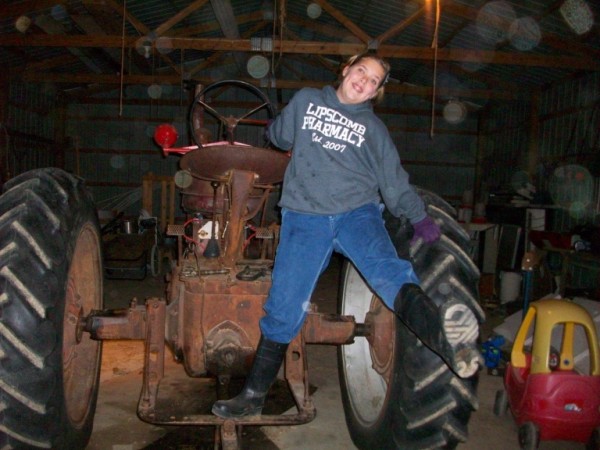
Emma fooling around on the tractor.

Emma fooling around on tractor

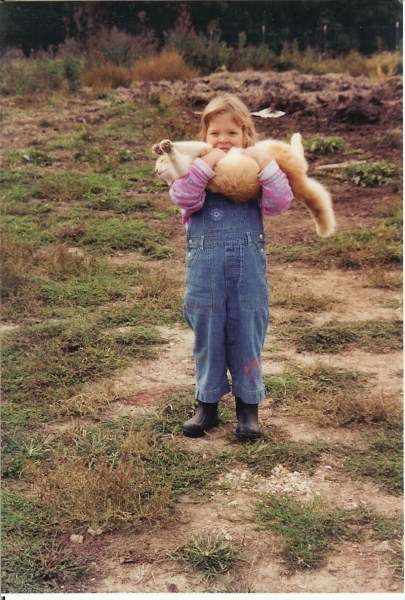
Emma loves to make us laugh

Emma loves to make us laugh

Emma was born on March 18th 2000. Happy Birthday Emma!

Posted in Family | Comments Off on Happy 12th Birthday Emma!